
I can’t think of any other SEO project posing as many risks to business as site migration.
Whether you are migrating your site from one domain to another or migrating an International domain, the process is the same.
The process affects almost every technical aspect of the website, which means that the possibility of losing rankings goes up with every element you change or migrate.
A site migration requires a deep multi-department collaboration to succeed too. Developers, SEOs, content teams, and other stakeholders must work together if they want to ensure a smooth transition.
Not to mention, a one resulting in as little downside to the company’s search visibility, as possible, at that.
But the project becomes even more challenging when a company decides to migrate their international site.
Without a plan, such migration can result in a significant and permanent loss of the search equity the company has worked hard to earn.
So, with that in mind, I decided to create an international site migration checklist.
The list below will show you and your development team:
-
How to plan and prepare for the site transition, and
-
What to do to lessen any negative impact it could have on your organic channel.
To guide you through the process better, I divided the checklist into three parts. Each corresponds with a different stage of the migration. This way, you’ll be able to follow the checklist as you go through the site transition.
Looking for some assistance? Leverage the expertise of our team with our website migration services.
Part I. Preparation
First, let’s cover what information you need to prepare and conduct a safe site migration.
Step 1: Identify the full scope of the change
Define the overall technical objective for the transition. Are you moving an international sub-domain to give it its own, unique ccTLD finally?
Or perhaps an international section you had in a subfolder so far has grown so much that you must move it elsewhere? Or is the migration related to a technical change, a new server or CMS?
There are pluses and minuses to deciding where to host your domain but general practice is to host it as locally as possible to the location that you are targeting.
For example, if you are targeting users in Germany then you may want to look at German hosting or even UK to cover the EU.
A CDN can also be a great solution as the CDN provider will be able to direct you and ensure that the hosting is locally to your site's users.
Once you have made your decision on hosting, you will want to try and avoid any potential impact the process might have on the site. Because, for example, moving a subfolder to a sub-domain will affect not only the international site. You’ll also change URLs on the main domain.
That said, it might not necessarily affect page layouts or templates. You might keep the same design and content easily, after all.
But moving to a new CMS will change your pages, too. You’ll be using a new code, and all your content will reside in a new database.
Step 2: Assess the risk
Next, find out how much those changes will affect the international site’s organic traffic.
I recommend you evaluate at least 12 months of total organic traffic to the site. Don’t forget to review traffic to the international section you’re migrating separately to understand its performance, too.
Then, analyze the traffic per landing page. For example, run a specific report on visitors who landed on the main home page and those who started on the international home page.
In doing so, you’ll determine how much of your traffic depends on those pages retaining their rankings.
Rank Intelligence, for example, allows you to extract such data for any URL, section of the site and for any time frame you prefer.
![]()
(Rank Intelligence report in seoClarity)
Step 3: Determine what critical assets you’re migrating
I recommend you go beyond just listing the pages on the site. Also review:
-
The content on those pages (also to see if you could improve some of the old pages during the process,)
-
Meta-titles and descriptions and preserve them to use on the new pages,
-
Canonical URL tags. Depending on the scope of change, you will need to re-assess all existing canonical tags before carrying them over to the migrated site.
-
Internal as well as external links pointing to each page to evaluate whether Google has redirected all of them to the new site.
Step 4: International Site Optimizations
The migration is a great time to also start thinking about what portions of the site need an update. You can utilize this to consider moving from https to http2 for example.
I also recommend that sites review their current URL structure during this time to ensure that the URLs are optimized in the language of the region that they are targeting.
During a site migration, you may need to update the URLs so you might as well make any optimizations at the same time. This will alleviate the team from having to make future 301 redirects unnecessarily.
Part II. Transition
Following all the steps above ensure that you’re ready for the transition. With the data you’ve collected, you can monitor its impact afterward. This section lists what you need to do actually to perform the migration from the SEO point of view.
#1. Redirect URLs
A major part of a site migration is moving old pages to a new domain or sub-domain. And in the process, changing their URL structure (at least for some pages.)
So, as the first step, ensure that you’ve mapped each old URL to its new equivalent and created relevant 301 redirects.
Even creating a simple Excel spreadsheet listing old slugs in one column and new ones in the other are enough to ensure you didn’t forget to redirect a critical URL.
But there is another reason for setting up those redirects - to ensure you retain both internal and external links that have been pointing to the old page.
With a 301 redirect, they will remain valid, and won’t trigger the 404 error when users and search bots try to access them.
TIP: In the case where you’re compiling multiple pages into one, set up 301 redirects to any other page on a similar topic or the parent page (a higher-level category, for example).
#2. Create or Update the XML Sitemap
Depending on the scope of the migration, either update the existing sitemap or create a new one.
But remember not to remove the old sitemap immediately from the server. Instead, maintain both, the old and the new sitemap. I recommend you keep them there for at least 60-90 days.
And remove the old sitemap only when you notice that Google has indexed new URLs.
Before you submit the new sitemap, evaluate it for errors too. Conduct a sitemap audit with Clarity Audits, for example. It allows you to crawl the sitemap to identify any issues with redirects, ensuring that you’re submitting an error-free sitemap to Google.
To do so, create a new project in Clarity Audits and set it to crawl only your sitemaps (see below.)
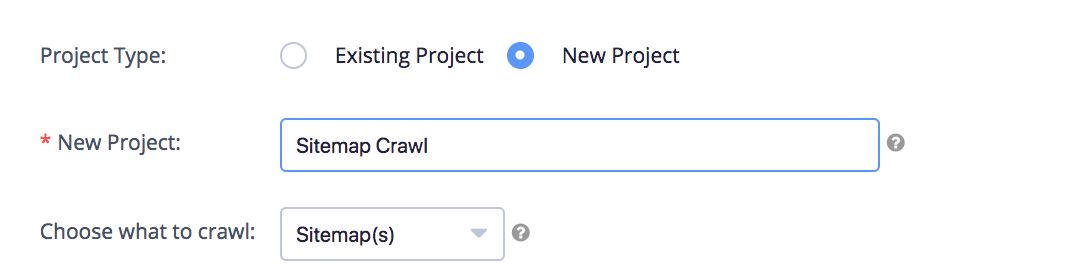
(A sitemap crawl setup in Clarity Audits)
#3. Evaluate the Hreflang Tag for Potential Errors
Finally, edit or add the hreflang tag to your site. Its inclusion is the most important aspect of international SEO, after all.
Also, after the migration, check whether your hreflang has been updated and determine that there are no hreflang errors. Conduct a micro-site audit focusing on it, specifically.
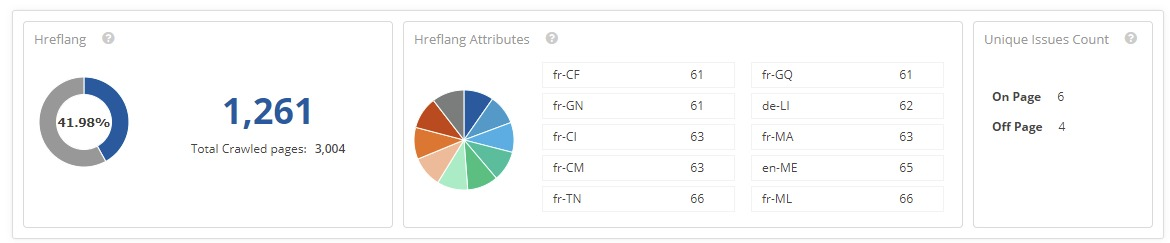
Clarity Audits, for example, allows you to crawl the site, looking for potential issues with the hreflang tag only.
All audits by default will analyze on-page hreflang, but you can enable an audit and analysis for issues such as Return Tag Errors, or 3XX, 4XX, 5XX responses for hreflang URLs, etc. that can be found by crawling the hreflang URLs.

(A hreflang crawl setup in Clarity Audit)
The image above shows advanced settings for creating a new crawl within Clarity Audits.
Enabling the option for hreflang crawl adds all the hreflang URLs to the crawl queue.
Each hreflang URL is then crawled and checked for issues related to response code, blocking by robots.txt, robots meta or robots header, as well as other issues found by crawling the hreflang URLs.
When the crawl is complete, navigate back to Clarity Audits to see all your existing crawl projects, and click any one to see its specific audit report.
You can see all issues checked and all issues detected, including any potential problems with the hreflang. Another area of the platform to see the insights from the crawl is Site Health 3.0 (pictured below).
Uncover each specific issue impacting site health — including those from the hreflang audit specifically.
 (Site Health 3.0 in the seoClarity platform.)
#4. Updating Google Analytics and Google Search Console
The #1 most forgotten migration step is updating your Google Analytics and Google Search Console information on your site. You will want to ensure the most recent XML sitemap is listed.
You will also want to designate the country you are targeting to let Google know of the existence of the International domain.
Part III. Evaluating the Migration Success
With the migration done, the last thing to do is to ensure it was a success and set up measures to monitor its effect over time.
Here’s how to do it.
First, mark the migration date in your SEO platform. It’ll be easier to benchmark any pre- and post-migration data this way.
Then, set it up to run daily ranking reports from the transition day.
When reviewing those reports, pay attention to the following symptoms:
-
Top non-brand keywords shifting in rankings significantly.
-
Landing page URL to spot when Google has replaced old ranking URLs with the new ones.
The simplest way to do so is by creating a custom dashboard covering such information. This way, you can review the above insights quickly without having to dig for the data.
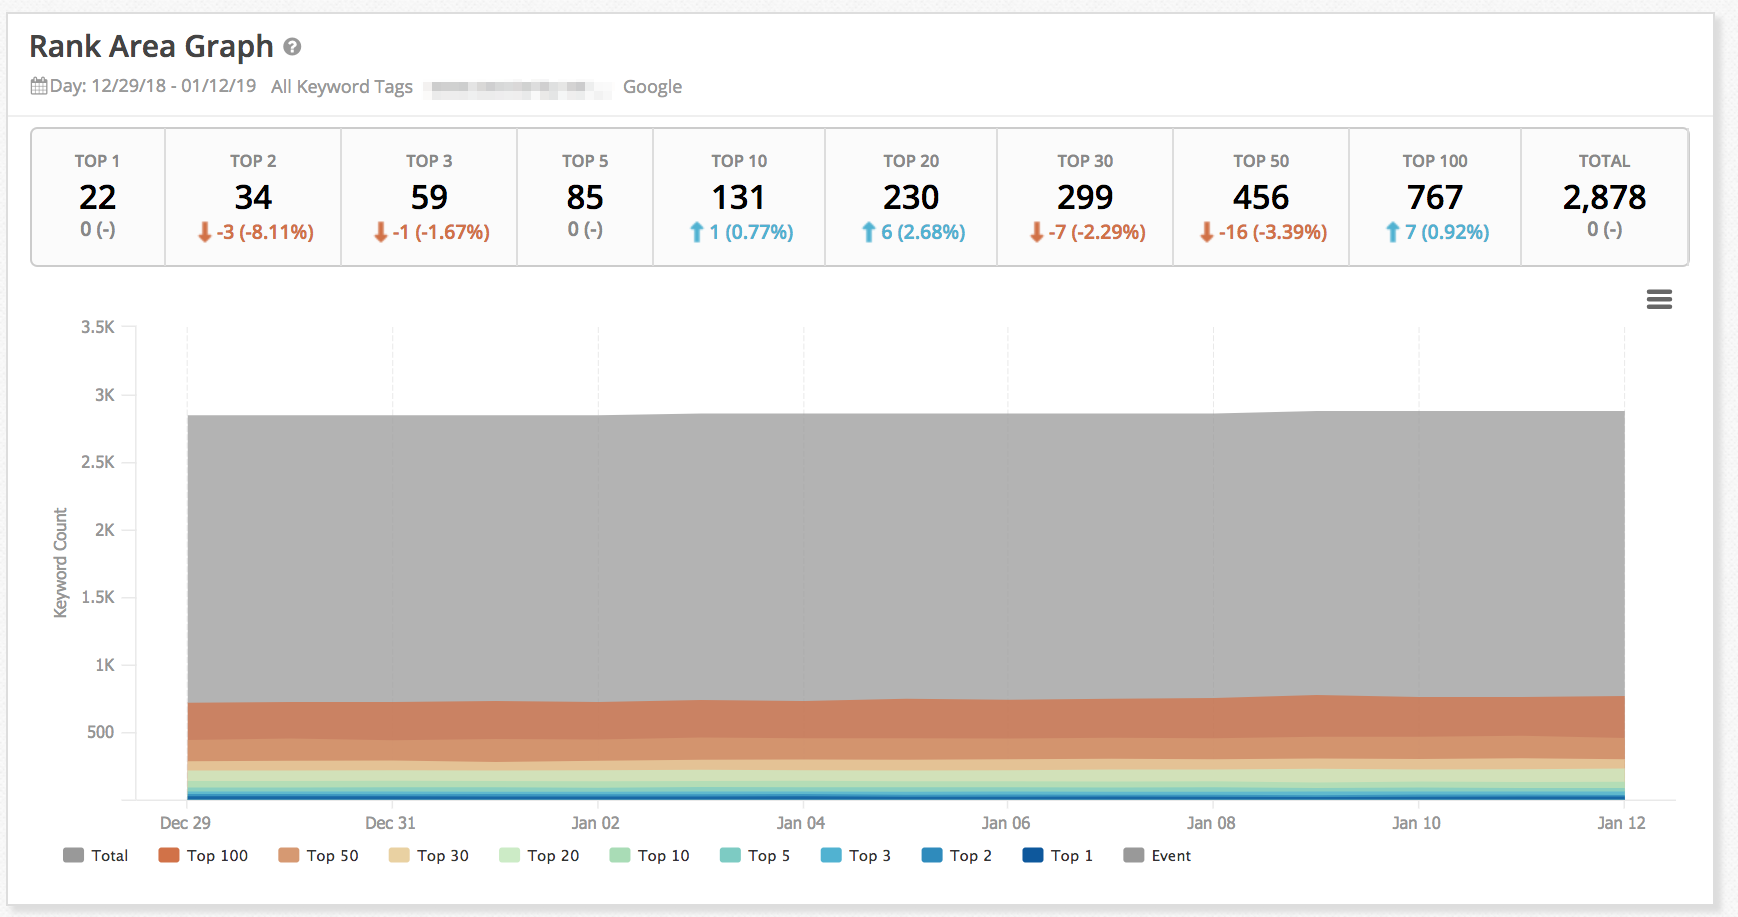
(Rank Area Widget on a Ranking Dashboard in seoClarity)
Also, review the crawling and indexation of selected new pages.
You can do this in two ways. The first one, use the “URL Inspection” feature in the Google Search Console. In the Coverage section, you’ll find information about the date of the last crawl.

The other way is to review the Google cache manually. Search for the page in Google and click the cache information for the listing. The search engine will display the date for the last cached version it has in the index.

Another thing I always recommend is to set up tracking traffic by the page types.
Aside from monitoring rankings per keyword, track the traffic to specific page types, i.e. homepage, product pages, category pages, blog.
Such reports will tell you how much the migration might have affected different Page Types, and whether their traffic remained consistent pre- and post-migration.
There is a specific reason for doing the above. Most likely, you’ve changed content or page layouts during the migration.
The effect of such change will go beyond just affecting rankings for individual keywords. It will affect how all pages created with such a template behave in the search.
By monitoring page type rankings, you’ll be able to spot and eliminate any such problems fast.
Finally, crawl the international site to verify that no 404 errors exist and that all redirects work properly.
You don’t have to do this more than once. I recommend you do, however, crawl your site for any redirects, broken links and other issues related to problems with URLs.
Clarity Audits will identify all those issues and more to help you eradicate them before they cause serious damage to your visibility.


Comments
Currently, there are no comments. Be the first to post one!