The viewport tag instructs a browser on how to control and scale a page’s dimensions for presentation to users. After all, a smartphone has a much different surface area to display content (i.e. viewport) compared to a desktop.
It is recommended to configure the viewport tag to increase the device-friendliness of your site.
If your pages are missing the viewport tag, you can add them to better enhance the user experience. Read on to learn how.
Table of Contents
The Importance of a Viewport Tag
The viewport is the user's visible area of a web page.
If there is no viewport tag set, mobile browsers tend to default to rendering the page at 980px — the typical width of a computer screen.
This, of course, creates sizing issues for the content’s presentation, and can create a negative user experience. When mobile content attempts to fit the viewport of a desktop, content is zoomed out to a point that interferes with readability.
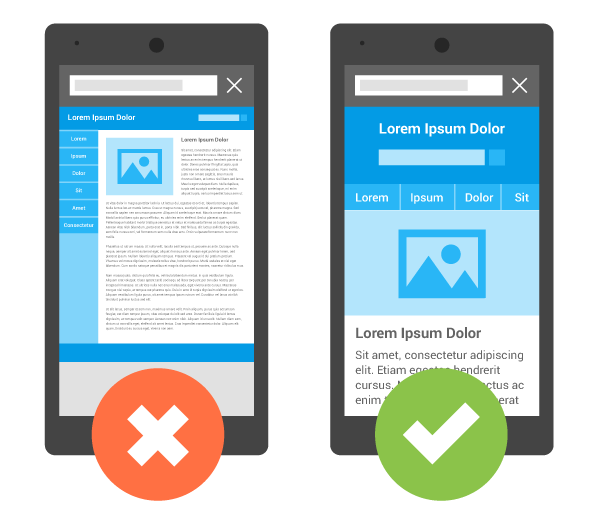
In the image above, the example on the left has no viewport tag set. The content tries to course-correct for the sizing difference, making it hard to read.
A much better user experience comes with the image example on the right, which has a viewport tag.
How to Add Viewport Tags
Configuring the viewport tag will increase the device-friendliness of your site.
The viewport tag is a <meta> element that lives within the <head> section of your site. Here’s an example of what it could look like:
<meta name=“viewport” content= “width=device-width, initial-scale=1”>
Let’s break this down.
width=device-width: This sets something called device-independent pixels. The page is instructed to match the screen’s width in pixels appropriate for the device.
initial-scale=1: This part of the tag establishes a 1:1 relationship between CSS pixels and device-independent pixels, no matter the orientation of the device.
There are a few other attributes that can be added to the viewport tag, like minimum-scale, maximum-scale, and user-scalable, but Google does not recommend these attributes. They can prevent users from physically zooming in to the viewport.
Once you’ve established the attribute, it’s time to add it to your pages. If you have the right edit access, you’ll be able to do this on a page-by-page cadence. Just remember that the tag goes within the <head> section of the page.
If you don’t have the right user permissions, you can bring in the dev team to help you implement these changes.
How to Add Viewport Tags at Scale
If you do not have a viewport tag on your page, it can be added in a matter of minutes with SEO execution platform ClarityAutomate.
This simple optimization only requires a few clicks.
- Select what you'd like to optimize: Code
The viewport tag is a part of your site’s code, so that’s what we’re looking to optimize in this scenario.
- Choose how you'd like to optimize it: Add New
ClarityAutomate gives you the option to add, delete, or update elements. In this case, we want to add the viewport across pages.
- XPath location: XPath within the <head> where you would like the viewport tag added
This step specifies the location of where the new tag will be added.
- Specific Location: You can choose “Add before location” or “Add after location” depending on where you want it added
ClarityAutomate gives you the option to specify exactly where the new tag will be added.
- Code: The viewport tag to be added
Then, just drop in the viewport tag and push the changes live. These simple steps have just worked to increase the user experience!
Here’s an example viewport tag that we were able to add to a page with ClarityAutomate:

Looking for other viewport issues?
- Viewport Tag Does Not Have a Width Set
- Multiple Viewport Tags Were Found in the <head>
- Viewport Tag Has a Specific Width Set
- Viewport Tag is Missing the Initial-Scale Attribute
- Viewport Tag is Missing the Width Attribute
- Viewport Exists Outside the Head
- Viewport Has a Maximum-Scale Set
- Viewport Has a Minimum-Scale Set